HOW MANY SHADES DO WE NEED?
Case by Gasparatos Spyros, Postgraduate student in Restorative Dentistry program, Faculty of Dentistry, National and Kapodistrian University of Athens, Greece
Restoring anterior teeth with large defects using composite seems to be quite challenging. With high-performance materials at hand and a systematic layering concept in mind, however, it is possible to produce highly aesthetic results in a reproducible way. The clinical case below is used to illustrate a dual-shade layering technique with CLEARFIL MAJESTY™ ES-2 Premium, a composite system with pre-defined colour combinations.
CASE EXAMPLE
The patient, a young male, was unhappy with the appearance of his maxillary anterior teeth. Several years ago, his central incisors had been restored with composite. These existing restorations had defective and heavily discoloured margins, while their shade did not match the adjacent natural tooth structure. The maxillary lateral incisors were peg-shaped (microdontia). Economic considerations and the desire to save as much natural tooth structure as possible made the team decide to restore all four maxillary incisors with composite. CLEARFIL MAJESTY™ ES-2 Premium became the material of choice as it eliminates the need for complicated shade combination formulas and supports predictable outcomes.
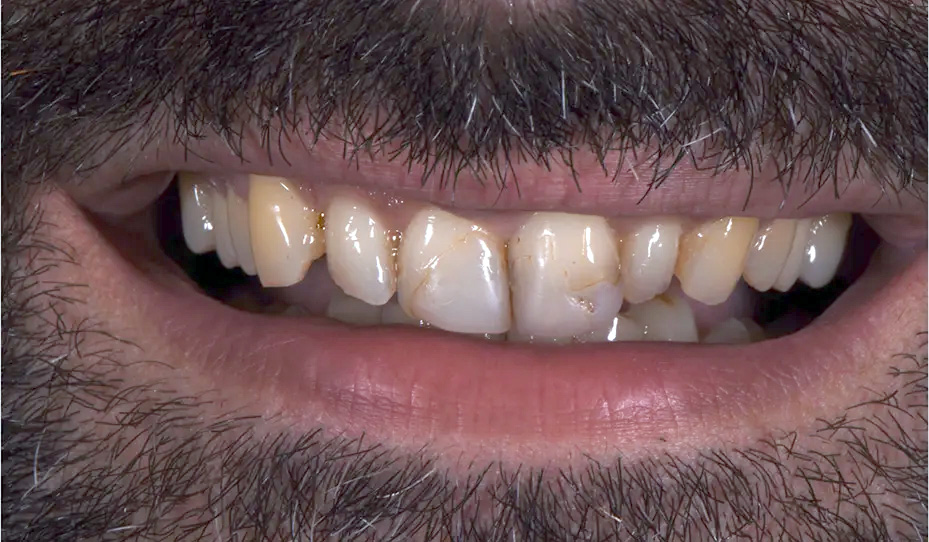
Fig. 1. The patient’s initial smile.
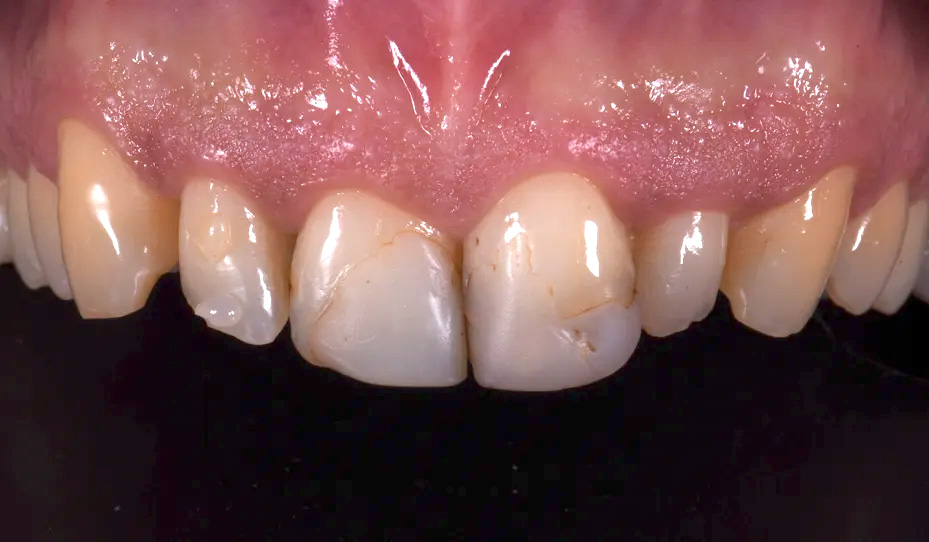
Fig. 2. Intraoral image of the initial situation with defective composite restorations and microdonts. Two composite buttons on the right lateral incisor are used to verify the determined shade combination.
RESTORING THE CENTRAL INCISORS
We decided to restore the central incisors first and then focus on the lateral incisors. The tooth shade was determined using the VITA™ classical A1-D4 shade guide, while composite buttons were applied to the teeth to verify the determined shade combination. In order to simplify the restoration procedure, a palatal silicon index was produced before removing the existing restorations. During minimally invasive tooth preparation, bevels were created at the margins to provide for a smooth optical transition from the natural tooth structure to the composite.
An adhesive (CLEARFIL™ Universal Bond Quick) was applied after selective etching of the enamel to achieve a strong bond. With the aid of the silicon index, it was easy to create the palatal shells of the restorations with CLEARFIL MAJESTY™ ES-2 Premium in the shade A3E (enamel), which matches the determined tooth shade A3. The dentin core was built up with the same composite in the recommended shade A3D (dentin), mamelons were modelled and some CLEARFIL MAJESTY™ ES-2 Premium in the shade WD added for the incisal halo, while some individual effects (like enamel cracks) were imitated with brown stain. The build-up was finalized in the interproximal and labial areas with composite in the shade A3E. Between the central incisors, a wedge was used to retract the papilla and facilitate the designing of the interproximal contact area. The finished and pre-polished restorations already had a natural appearance.
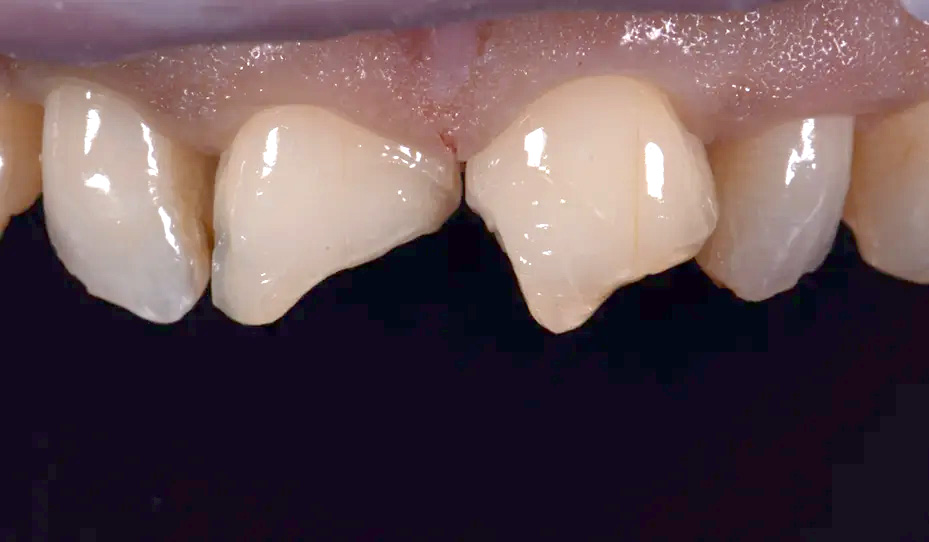
Fig. 3. Central incisors after removal of the old restorations and the beveling of the enamel.
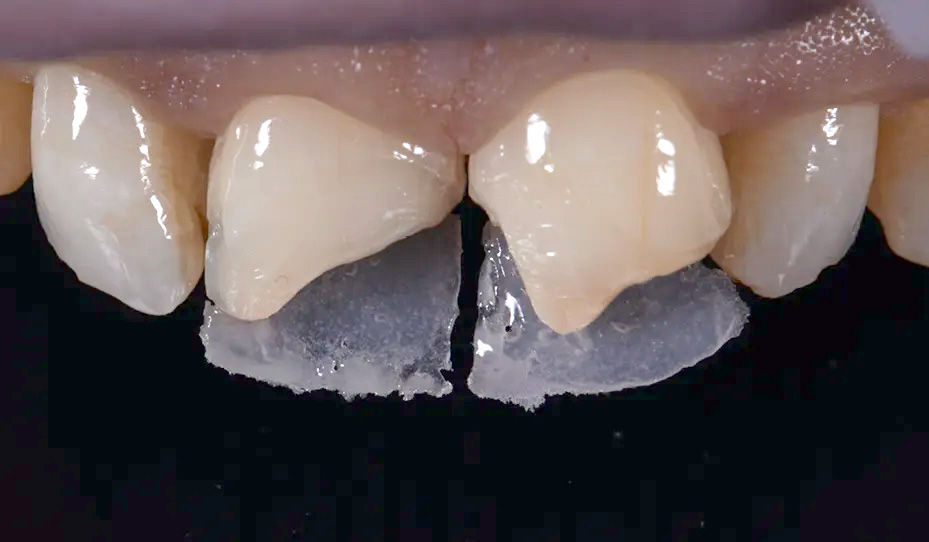
Fig. 4. Light-cured palatal shells made of CLEARFIL MAJESTY™ ES-2 Premium in the shade A3E.
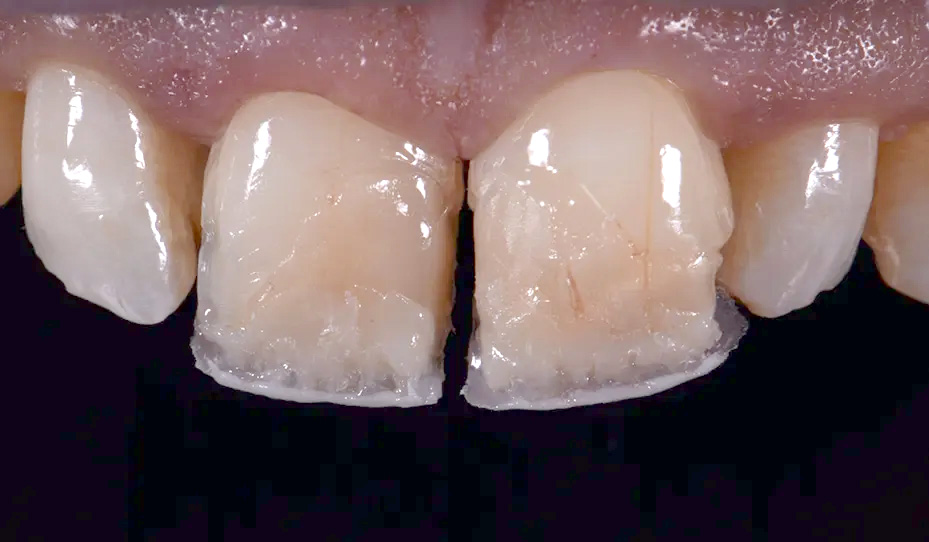
Fig. 5. Build-up of the dentin core with mamelons individualized with the shade WD and brown stain.
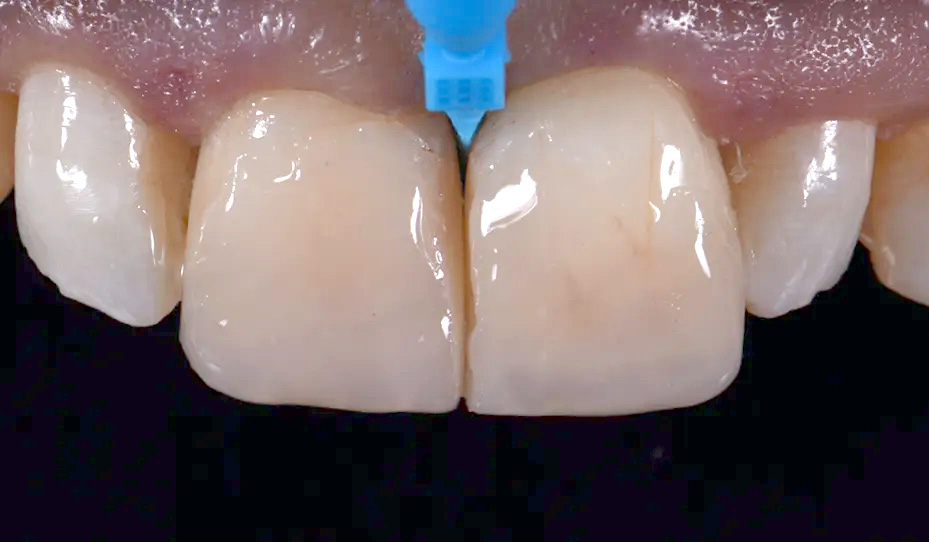
Fig. 6. Situation after finalization of the central incisor restorations with composite in the enamel opacity.
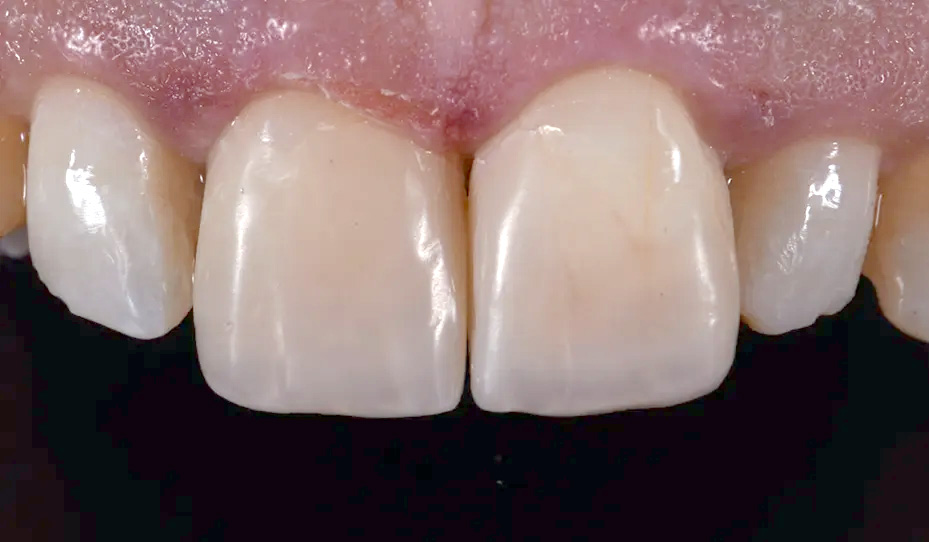
Fig. 7. Central incisor restorations after finishing and initial polishing.
RESTORING THE LATERAL INCISORS
Tooth preparation was not required on the lateral incisors. Instead, they were merely cleaned after a slight roughening of the enamel surfaces. The build-up procedure was similar to the one used for the central incisors. The adjacent tooth was protected with PTFE tape, and the palatal shell was created with the aid of a finger instead of a silicone index. Afterwards, we focused on the build-up of the interproximal walls before a small amount of dentin was placed and the shape was finalized by applying the labial enamel layer. Finishing and polishing was accomplished with CLEARFIL™ Universal Bond Quick. The procedure ended with high-gloss polishing of all four restorations using CLEARFIL™ Universal Bond Quick.
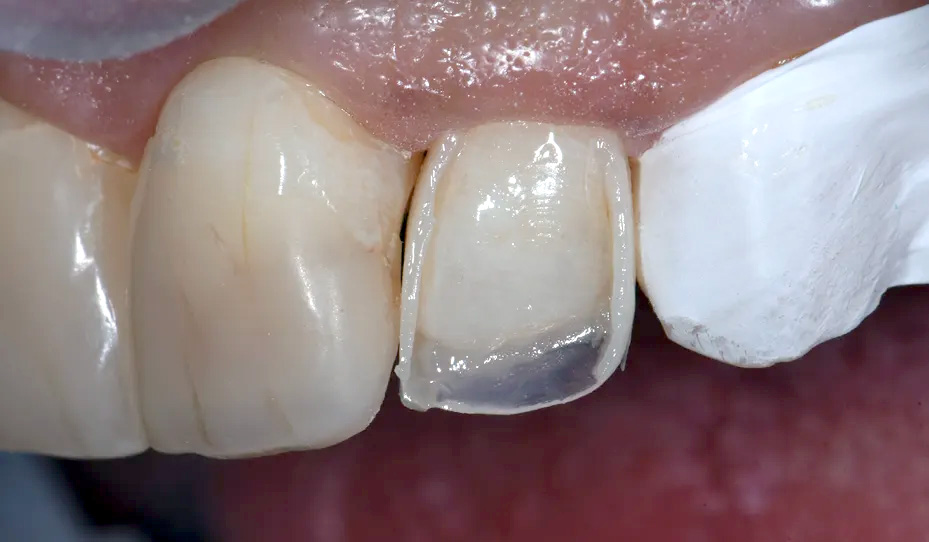
Fig. 8. Build-up of the left lateral incisor.
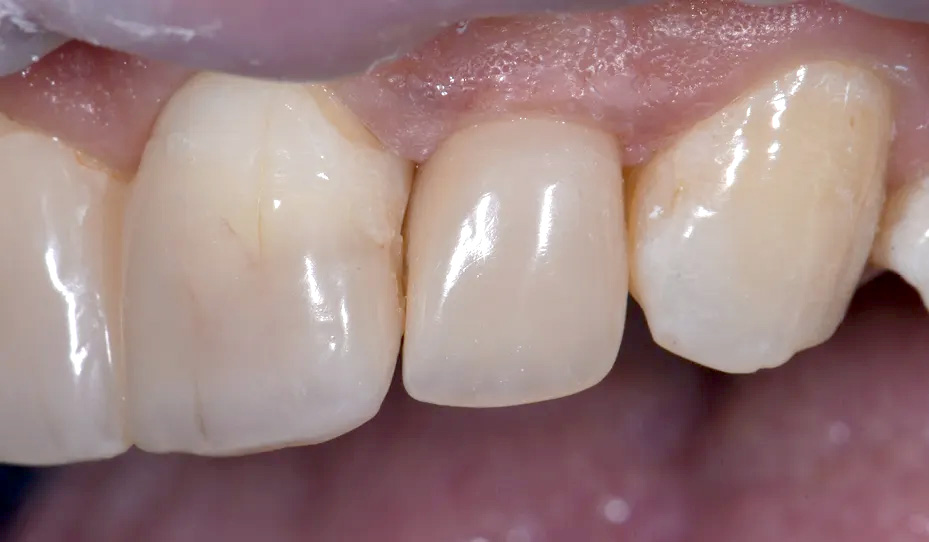
Fig. 9. Situation after finishing and polishing.
FINAL SITUATION
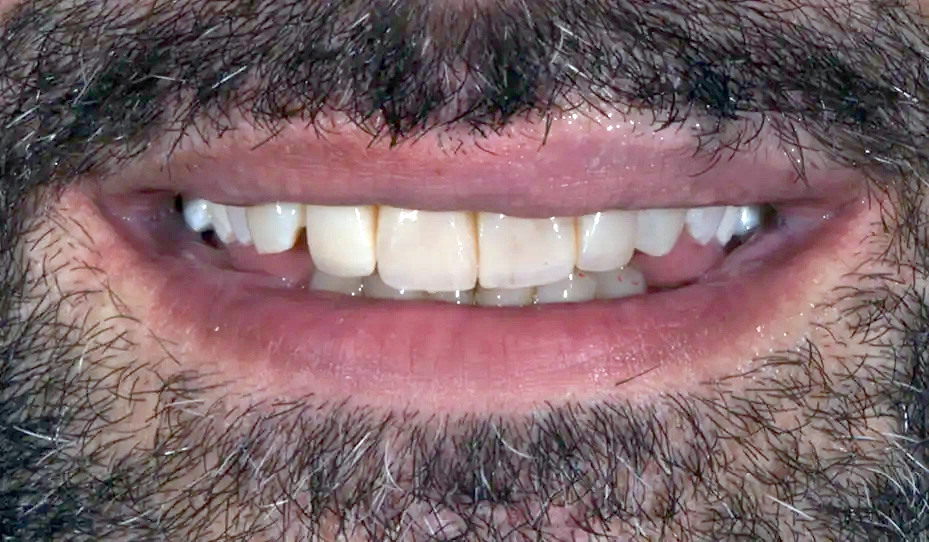
Fig. 10. Final smile of the patient’s demands.
CONCLUSION
Two different opacities, a single shade combination and some bleached shade plus stain for special effects – in the present patient case, a simple formula allowed us to create lifelike anterior restorations. With one enamel and one dentin paste used, it is possible to simply rebuild the natural anatomy without the risk of ending up with a bulky core that – once reduced – will lose its special optical structure. It is also easy to control the thickness of the final enamel layer with its huge impact on the light-optical properties of the whole restoration. For most patients and teeth with a simple or medium-to-complex internal color structure, the selected concept is very well suited and will lead to pleasing outcomes.